ArmaturePhysics for Blender 3D
Introduction
The ArmaturePhysics library is a set of python scripts (modules) that, combined with the open source program Blender 3D, can be used to simulate and visualize physically correct motion of a Blender armature (skeleton). The main purpose is to aid in creating character animations. For example one can simulate the motion of an animated elf jumping over a log, or a monkey swinging in a tree. One can also simulate mechanical systems such as a double pendulum, a spinning gyroscope, or a ballista hurling a large rock. One can even simulate a bow shooting an arrow, and see how the arrow buckles as the string pushes it forward.
Download
The library consists of 8 python files that one needs to put in Blenders python script path, so Blender can find them. The current scripts are designed to work with Blender 2.49b. The ArmaturePhysics library is free for commercial use and open source under the ZLib License (included in the header of the individual scripts).
ArmaturePhysics-1.0 Release date: 2010-08-29
Below is a couple of Blender template files that you probably want to download to get started using ArmaturePhysics, and to follow the video tutorials. Within the files, a template parameter file (python) is included. The first blender file is a very basic file that you may use as the basis for experimenting, and that is used in many of the tutorials. The second contains a humanoid character, with already added force bones, for example, that is also used in some of the tutorials.
The basics
The ArmaturePhysics library can be used for lots of physical simulations. For the moment, let us suppose that you have a humanoid character, rigged by a single armature. We approximate the body as being made up from a set of rigid shapes. For example we associate the mass and dimensions of the entire upper arm, including muscles, to the armature bone that is driving the upper arm. A simple way of doing this association, is to treat every bone (that we would like to have some physical properties) as a frustrated cone. A frustrated cone is a cylinder that may be thinning towards one end. So we approximate the body as being made up of theses cones. One cone per bone that we want to have some physical property. Now, there are a couple of modes by which we can make a simulation for this character.
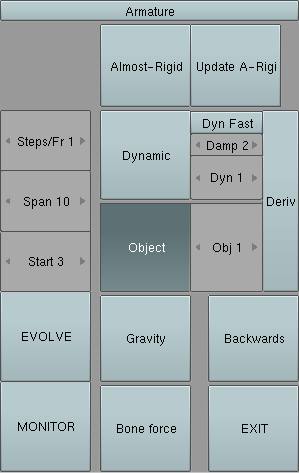
Object mode: Here the user specifies what pose the character should have at every frame during the simulation, and what external forces that acts on the character. By pose we mean how the character holds his arms, turns his head and so on. The program then calculates how the body (the object) as a whole moves and rotates according to the laws of physics (Newtonian mechanics). Typically the simulation affects the pose of a user specified 'bodybone', that the all physical bones are parented to. Below the bodybone is indicated in blue. Note that in the simple example below, the character was at rest at the onset of the simulation, it can however just as easily move and rotate initially, and one can turn on gravity, other forces, hold points and so on.
 |
||||
Before object simulation: User defined poses. Note that the blue bodybone is not moving. |
|
After object simulation: The simulation was made using zero gravity (as if the character was floating in outer space). The blue bodybone is shifted and rotated to maintain the object center of mass, and maintain zero net rotatation (angular momentum). |
GUI: An exmple of how the graphical user interface might look for this type of simulation. |
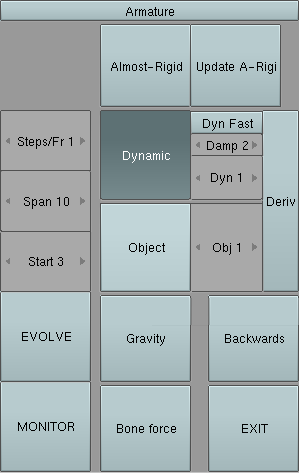
Dynamical mode: Here the character is treated like a jointed doll kind of. The joints can have built in springs and damping. This mode can also be used to simulate all sorts of mechanical systems (like a bow shooting an arrow).
 |
||||
Before dynamic simulation: User defined poses of the blue bodybone. Note that it is given a rotation after a couple of seconds |
|
After dynamic simulation: The limbs respond to gravity and the motion of the bodybone. |
GUI: An exmple of how the graphical user interface might look for this typ of simulation. |
One can also make a combination of the 'Object' and the 'Dynamic' mode. For example one could specify the pose of a jumping tiger, except for the tail, and let the program calculate how the entire tiger moves during the jump and how the tail swings (including how the tiger body and the tail interacts if one so wishes). There are lots and lots of other features. Like forces, torques, hold bones, ghost bones, constraints, monitoring features etc. See the tutorials below.
The user interface is partially graphic, and partially python. The user needs to specify for example the names of the armature bones that are considered as physical, in a python script file. Using the template script file that is included in the blend files linked above, this should not be too daunting however. It is just a matter of editing a text file, which is done from within Blender. The most common flags and settings can be accessed from the graphical user interface, and the simulation is run by clicking a button.
Note that for the final rendering of our character we need a mesh that is deformed by the armature in question, which is a standard technique in character animation.
Tutorials
There is currently no official written documentation for the ArmaturePhysics library. Instead the library is presented here by the videos that are linked below. Note that a working knowledge of Blender, in particular regular keyframe animation, is required to follow the tutorials. Note also that down in the right corner of the movie, keybord commands are displayed. However, due perhaps to a bug in the screen capture program, keyboard commands consisting of a function key such as 'Alt', combined with a regular key such as 'P', will only be displayed as 'Alt' (hence missing the regular key).
Also, these tutorials are admittedly often not as efficient as they could have been, nor are they particularly complete. Partially this is bacause whenever I edit the video, the exported video is (despite my efforts) much larger and of lesser quality than the original. But hopefully these original videos will be of some use.
Getting started
Physical object setup
Basic object evolution
Basic dynamical evolution 1
Basic dynamical evolution 2
Force bones
Hold bones 1
Hold bones 2
Torque bones
Ghost bones
Object and dynamical evolution How one can make a simultaneous object and dynamical simulation.
A large tree Using the 'Almost rigid option' to speed up simulation of a large tree being hit by something.
Bow shooting arrow 1 Making a bow and a string (the mysterious behaviour noted in the video turned out to be a bugg that is now fixed).
Bow shooting arrow 2 Adding an arrow being shot by the bow
Running character Using object evolution and IK constraints to make a character run.
Tricks for Running character Using Blenders built in Ghost visualization to aid the character animation, and a couple of other tricks.
Adding tail to running character Adding a tail to a running characte, doing a dynamical evolution to make it swing..
Jump on horse Using object evolution and holdbones to make a character jump onto a running horse - sort of :-)
Character swinging in tree Using object evolution for a character, and dynamical evolution to simulate the respons of a simple tree.
Jiggling biceps Using dynamical evolution to make a biceps mesh jiggle as an arm is moved.
Monitoring Using the monitor function to check the apparent force and torque acting on an object witha given motion.
Numerical instability How one can run into numerical instabilities using spring bones.
Reference parameter file Talking about the variuos settings in the parameter file (although not the most updated parameter file).
Speeding up evolution For complex scenes one can make a linked scene containing only the objects necessary for evolution, to gain speed.
Known issues
At times one gets an error accompanied by a pop-up message "Something went wrong in AngleBetweenVecs() ....". Usually it works to simply quit the graphical user interface, restart it and run the simulation again.
It seems also that using hold bones (possibly just for dynAndObjectFlag=True) in combination with stepsPerFrame>1 is somewhat less stable than one would desire.
Some tips regarding common pitfalls
Do not scale the physical bones, many of the ArmaturePhysics python functions requires the bone matrix (describing the scale and rotation of the bone) to be orthonormal. If you make a change to the armature in editmode (like adding a bone) you typically need to restart the user interface.
Some comments
Note that with ArmaturePhysisc you can make your character walk in a physically correct manner. However there are many ways of walking that are physically correct. You can walk with your knees high, flop your arms about, limp and roll your body every other step. Even if you try real hard to make your character just walk naturally forward a few steps, the character may end up looking quite drunk, constipated and/or totally disoriented. Learning how to make your character walk, is something like learning how to walk yourself. It can take awhile. Hopefully one will develop a set of clever tricks to serve this purpose. For example the trick used in the 'Running Character' tutorial, where I move the force from the heel of the character to a position in the middle of the foot immediately below the center of mass, I came up with just before doing the tutorial. Similarly I only tried using the Blender Ghost visualization as I was doing the 'Tricks for running character' tutorial. So there may be plenty of as of yet uninvented tricks, that does not even require any code development. If the code is ported to work with Blender 2.50, a new world opens up because then one can define shortcuts (hotkeys) for many typical procedures.
Note that while the motion that you produce may be physically correct, the strains on bones and muscles necessary to achieve that motion may exceed what is possible for a human, or whatever character you are animating. In principle one could monitor these strains, to insure that they do not exceed certain values. This requires som minor addition to the code, but all the basic functionality for that is already there. If somebody writes a muscle system for Blender, it could be a relly useful feature.
Background
A few years back (probably around 2005) I was talking to a 3D artist who told me that they did character animation by just specifying (keying) the character pose and position at subsequent frames. There was no physics involved to insure that the basic laws of physics were obeyed. This surprised me since it seemed like a rather simple project to make a physics simulation to aid the animation.
Also I recall from even such a block buster as Lord of the Rings that there are lots of animations of Legolas climbing oliphants and swinging up on horses that look decidedly unphysical.
Of course for many big movie productions (like Kong), one tracks the motion of an actual human (dressed in a particular suit) with markers which is then transferred to the animated character, so called 'motion capture'. This can give great results, although these motion capture systems are comparatively expensive. Also motion capture can be difficult to use in fictional scenarios like a person climbing up the neck of a brontosaurus (note that we have some shortage of actual brontosauri currently), or dangerous scenarios where the motion capture person risks injury. The same goes for scenarious that require superhuman strength or agility. Actually even more obvious shortcomings occur if the animated character has more legs, or wings, than your regular human.
I also recall seeing an instruction video for Maya where the animator could control the musle tension (it was the biceps of a character), and then by hand insured that there was some time laps before the arm got any substantial movement. I thought that this is such a simple scenario to make a physical simulation of that I was surprised to see this done by hand in stead.
So, around the end of september 2009, I started writing the armature physics script. It was originally just intended as a one or two-week project. But I kept adding to it, and ended upp spending many months on this library.
A comment about other libraries
There is a much more extensive and faster physics engine (Bullet) associated with Blender 3D. At the onset of the ArmaturePhysics project, the bullet engine (within Blender) could be used to simulate for example balls bouncing off a plane, and lots of other stuff. There were also support from Bullet to do rigid body simulations, which is at the core of the ArmaturePhysics library. However, Bullet was not (to my knowledge) integrated into Blender in such a manner that it could be used to aid in character animation in the way that I was interested in. Note however that there is a Google summer of code 2010 project aimed at integrating Bullet more fully into Blender, so that may be worth checking out as an alternative to using the ArmaturePhysics library.
Outlook
The armature physics library is still very much in a trial state. The list of ideas of improvements is still very, very long. Main topics are speed, graphical user interface, code structure and all sorts of new functionality. If further development will take place depends in part on how other projects, such as more fully integrating the Bullet physics engine into Blender, will proceed.
Contact
If you have any questions or comments you can, at least for the time being, try to contact me at rickard@relativitet.se. Let the email topic be just "ArmaturePhysics". If I have the time, I may be able to help you out.
Donation
I leave no garanties about the functionality of this library. However it was months of hard work to write this library, and if you find it useful, consider donating a dollar or three.